 By Audrey Hayes
Updated November 2026
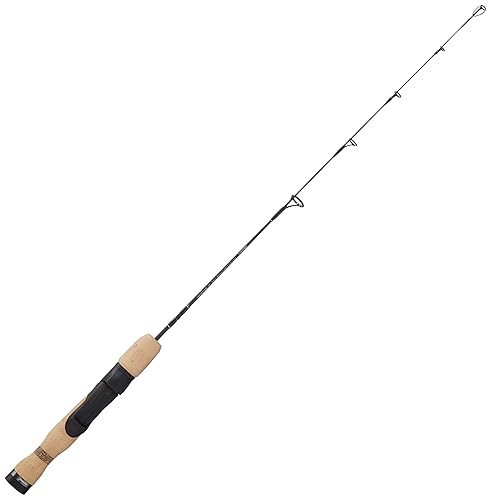
To make your own ice fishing rod, you start with a short, sensitive blank, add a reel seat and guides sized for your line, and finish with a grip and a tip that shows bites clearly. The whole build takes a few evenings and gives you a rod tuned to the species and depth you actually fish. This guide covers the parts, the assembly steps, and the mistakes that cause most homemade rods to fail.
Choose the Blank and Set Your Rod Length
The blank determines most of how the rod will feel, so start there. Most hard-water anglers use a blank between 24 and 36 inches for panfish and perch, and 30 to 36 inches for walleye and larger species. Shorter rods are easier to control over a hole, while longer rods help with bigger fish and deeper water. A light power rating suits panfish, and medium power suits walleye and trout. For length guidance by species, see Walleye Ice Fishing Rod Length: How to Pick the Right Size (2026).
Shopping for one? See our guide: Ice Fishing Rod Blanks Compared: 5 Best for Hard-Water Anglers (2026).
Gather Parts and Assemble the Rod
Once you have a blank, collect the rest of the parts before you cut or glue anything. Using a checklist keeps you from stopping halfway through a build.
- Ice rod blank, sized to your target species
- Reel seat, sized to the diameter of your blank’s butt section
- Guides: one tip guide plus one or two line guides, sized to your line
- Cork or foam grip material
- Two-part epoxy and thread wrapping material
- Rod-building thread, a cutting tool, and sandpaper
- A fine-tip marker and a tape measure
Mark your guide positions first. Place the tip guide about one-quarter inch from the tip, then space the remaining guides evenly down the blank, with the largest guide nearest the reel. Wrap each guide with thread, then coat the wraps with epoxy. Let the epoxy cure fully before handling the rod roughly.
Attach the Reel Seat and Grip
Slide the reel seat onto the butt section and mark its position so the reel sits where your hand naturally rests. Glue the reel seat with epoxy and wrap it for security. Then add the grip, which should be snug, with enough length to hold comfortably with one hand. Many builders leave a small gap between grip and reel seat so the rod can flex freely.
Check the Action Before You Finish
Before the final coat of epoxy, flex the rod by hand and check how it bends. A tip that bends smoothly and recovers quickly is sensitive, while a rod that bends too far into the lower third may be too soft for your target fish. Make adjustments now, while the epoxy is still soft.
Common Mistakes to Avoid
- Mismatching guide size and line diameter, which causes tangles and line stress.
- Gluing the reel seat before confirming reel position.
- Skipping cure time, which leaves wraps loose and guides shifting.
- Choosing a blank that is too stiff for panfish or too soft for walleye.
- Rushing the finish, which leaves air bubbles and rough spots in the epoxy.
Recommended Gear
A quality rod-building kit with guides and epoxy simplifies the build. View on Amazon
A dedicated rod-building thread and wrapping tool keeps wraps even and tight. View on Amazon
A small reel seat with a secure locking nut helps prevent the reel from shifting under load. View on Amazon
FAQ
Do I need special tools to build an ice fishing rod?
You need a cutting tool, sandpaper, thread, epoxy, and a way to hold the blank steady while the epoxy cures. Most of these are inexpensive and easy to find at a general hardware or tackle store.
What is the best blank length for a homemade ice rod?
Panfish rods typically run 24 to 30 inches, while walleye and trout rods often run 30 to 36 inches. Choose based on the fish you target most often and the depth you usually fish.
How long does a homemade ice rod take to finish?
The active work takes a few hours, but epoxy needs time to cure fully. Plan on two to three evenings so each stage has enough time to set properly.
Conclusion
A homemade ice rod is easy to customize once you understand how the blank, guides, and reel seat work together. Start with a blank suited to your target species, assemble carefully, and test the action before the final coat. With a little patience, you will end up with a rod that fits your fishing style.
Related reading
- Ice Fishing Rod Case Homemade: 5 Builds You Can Make This Weekend
- How to Make a Custom Ice Fishing Rod: A Step-by-Step Guide
- How to Make Ice Fishing Rod at Home: A Step-by-Step Guide
- Home Made Ice Fishing Rod Holder: 5 Simple Builds You Can Make Tonight
- Which St Croix Rods Ice Fishing Models Are Worth Buying? 5 Picks Compared
Ready to choose one?
About Audrey Hayes
Audrey Hayes is part of our editorial team and reviews and edits our ice fishing guides, checking product details against manufacturer specifications and owner feedback.