As an Amazon Associate I earn from qualifying purchases. This page may contain affiliate links.
Ice fishing safety equipment is the gear that keeps you alive if the ice gives way, and it is the first thing you should check before you drill a single hole. This guide walks through the essentials, explains how to use each item, and shows you the mistakes that catch even experienced anglers off guard. By the end, you will have a clear checklist for packing your truck or sled and a practical plan for what to do if you go through.
Start With Ice Thickness, Not Gear
No piece of equipment replaces good ice judgment. Gear helps you survive a mistake, but thickness readings tell you whether you should be on the ice at all. Use these general guidelines, which many state DNR and fisheries agencies publish in similar form:
Shopping for one? See our guide: Floater Suits Ice Fishing: 9 Best Picks for Open-Water Safety (2026).
- Under 2 inches: Stay off. Keep out of it entirely.
- 2 to 3 inches: Fine for walking or ice fishing alone on foot, with caution.
- 4 inches: Generally considered safe for a single person on foot.
- 5 to 7 inches: Often cited as safe for snowmobiles or ATVs, depending on the agency.
- 8 to 12 inches: Typically the range cited for cars or small trucks.
These numbers apply to clear, solid, refrozen lake ice. Snow cover insulates the ice and slows growth, moving spots, inlets, outlets, bridges, and areas near current can be far weaker than the surrounding sheet. Always check with local conditions reports and bait shops before you go. For lake-specific guidance, see Lake Mille Lacs MN Ice Fishing: When It's Safe and Where to Go and Ice Fishing at Lake of the Woods: Where to Go, When, and How.
The Core Safety Equipment Checklist
Most ice-related drownings happen because the person could not get out of the water quickly or could not stay afloat while cold-shocked. The following items address those two problems directly.
- Ice picks (ice claws): A pair of handheld spikes worn on a cord around the neck. They let you pull yourself out of a hole by digging into the ice.
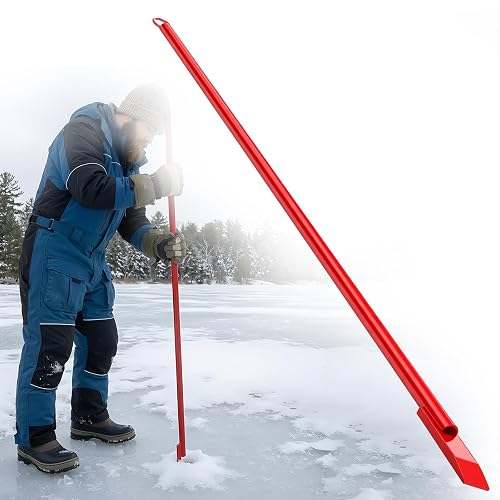
- Spud bar or chisel: A long steel bar you use to test ice ahead of you as you walk. Strike the ice in front of every step.
- Throw rope or rescue line: A buoyant rope, typically 50 feet or longer, stored in a bag so it can be thrown to someone in the water.
- Floater suit or flotation suit: A insulated suit with built-in buoyancy that keeps your head above water and reduces the cold shock response. See Floating Suit Ice Fishing: How to Stay Afloat If You Break Through the Ice.
- Life jacket or PFD: A wearable flotation aid. Inflatable models offer less bulk but require you to be able to activate them.
- Dry clothing change: Stored in a sealed bag in your vehicle or shelter. Wet cotton and wool become heavy and chill quickly.
- Hand-warmers and a thermos: Helpful for keeping hands working, which matters for climbing out.
- Cell phone in a waterproof case: Keep it on your person, not in a pack that might sink or stay on the sled.
- Ice cleats or traction devices: Slip-on spikes for boots reduce falls on clear ice. Footwear matters as much as anything else here, and Korker Ice Fishing Boots: A Step-by-Step Guide to Choosing and Using Them covers one popular option in depth.
How to Use Ice Picks Correctly
Ice picks only work if you can reach them quickly and use them properly. Follow this sequence:
- Wear the picks around your neck, not in a pocket. Test that you can grab them without looking.
- If you break through, do not kick wildly. Spread your arms wide on the surface to stop sinking.
- Drive one pick into the ice ahead of you, then the other. Use short, hard strikes rather than leaning on them.
- Kick your legs to bring your body horizontal, then pull yourself up onto the ice with your arms.
- Roll away from the hole, not toward it, to spread your weight across the ice.
Floater Suits and Life Jackets: What They Do
The biggest threat after falling through is cold water shock, which can cause an involuntary gasp and rapid breathing within the first minute. Flotation gear keeps your face out of the water during that window, giving you time to control your breathing and reach the edge. Manufacturers of floater suits typically specify buoyancy ratings and the amount of insulation provided, so compare those numbers rather than relying on appearance. For a closer look at what to check before buying, read Ice Fishing Float Suit: 7 Things to Check Before You Buy (2026).
A life jacket adds buoyancy but can be bulky under outerwear. Many anglers prefer a flotation suit that combines insulation and buoyancy. Whichever you choose, wear it under your outer layers so it is not blocked by a jacket or pack.
Rescue Rope and Rescue Techniques
If someone else goes through, do not run onto the ice toward them. Spread your weight by lying flat, then move slowly. Use a throw rope if you have one, aiming a few feet beyond the victim. Once they grab it, pull steadily rather than yanking. If you have a sled, a ladder, or a board, slide it toward the hole to distribute your weight.
Call emergency services immediately, and give your location. Many lakes have marked access points, which helps responders find you quickly.
Recommended gear
Pick the items below that fit your fishing style. Ice picks and a throw rope are the two items that most often make the difference in a rescue, and both are inexpensive to carry.
- Ice picks with cord: Essential for self-rescue, and easy to wear around the neck so they are always within reach. View on Amazon
- Throw rope bag: A buoyant line in a compact bag that can be tossed accurately to someone in the water. View on Amazon
- Ice fishing float suit: Combines insulation with built-in buoyancy for those who fish on open water or travel across it. View on Amazon
- Spud bar: A long steel bar for testing ice thickness as you walk. View on Amazon
Common Mistakes
- Trusting ice near inlets, outlets, and springs. Moving water keeps the ice thin even on a cold lake.
- Relying on a single thickness reading. Ice varies across a lake. Test repeatedly as you move.
- Storing picks in a bag or pocket. If you cannot reach them in seconds, they will not help.
- Going alone without telling anyone. Share your location and expected return time.
- Driving vehicles onto unknown ice. Vehicles concentrate weight. Check thickness at every point before you drive.
- Wearing heavy cotton layers. Cotton holds water and drags you down. Choose wool or synthetic base layers.
FAQ
What is the most important piece of ice fishing safety equipment?
Ice picks are often considered the most critical single item because they let you self-rescue without outside help. A throw rope and a flotation device are close behind.
How thick should ice be before I walk on it?
Many agencies suggest at least 4 inches of clear, solid ice for a single person on foot. Thinner ice, or ice near moving water, is not considered safe.
Do I need a floater suit if I fish close to shore?
Shoreline ice can still break, and cold water shock is equally dangerous close to land. Many anglers wear flotation gear regardless of distance from shore.
Can I use a regular life jacket instead of a floater suit?
Yes, a properly fitted life jacket provides buoyancy. A floater suit adds insulation and keeps you warmer while you wait for help, which is a practical advantage.
What should I do if I fall through the ice?
Stay calm, control your breathing, spread your arms on the surface, and use your picks to pull yourself out. Roll away from the hole and get to warm, dry clothing as soon as possible.
How do I test ice thickness?
Use an auger or spud bar to drill or chip test holes and measure with a ruler or tape. Test every 20 to 30 feet as you move, and do not assume the ice is uniform.
Should I tell someone where I am going?
Yes. Share your planned location and return time with someone who can call for help if you are overdue. Carrying a charged phone in a waterproof case is also wise.
Is it safe to ice fish alone?
Fishing alone raises the risk because no one can help you if something goes wrong. If you do go alone, be extra conservative about ice thickness and always carry rescue gear.
Conclusion
Ice fishing safety equipment works best when it is packed, checked, and within reach before you step onto the ice. Start with ice thickness readings, carry ice picks and a throw rope, and consider flotation gear for open water. Practice your self-rescue plan at home so the steps feel automatic. For a broader gear list, see Safety Gear for Ice Fishing: What You Need Before Stepping Onto the Ice. Consult local authorities or a qualified professional for site-specific ice conditions.